Turbidimeter for MakePython exercises
I recently started an initiative at my local Makespace about advanced python training. It has been and still is a perfect environment to keep my python fresh and introduce other makers to the python most obscure and advanced features, as well as the surrounding environment.
In the upcoming meetings I decided to have a little hardware project. We are makespace after all, and making things is part of the implicit deal. So I started thinking what would make for an easy and cheap hardware gimmick that could be both interesting and focused on a real case problem. I spoke with a friend and we came up with the idea of a turbidimeter.
A turbidimeter is a measuring device generally used in chemical analysis. It evaluates the amount of light that passes through liquid with partial suspension to measure the concentration of the agent inducing the suspension. A typical scenario is to evaluate the bacterial charge of some sludge, as a higher amount of bacteria leads to a more turbid liquid. From the analytical point of view, the light that passes through is partially estinguished, and there is a logarithmic relationship (the Lambert-Beer law) that correlates concentration to light reduction. The same law is used in other spectroscopic measures such as UV/Vis.
Of course, a real turbidimeter is a nice, well behaved instrument. We want some toy that behaves like a turbidimeter, to measure the concentration of a solution of water and milk (which is readily available as this is Britain)
The hardware.
All you need for a turbidimeter is:
- a box that you can close
- a light source
- a photodetector
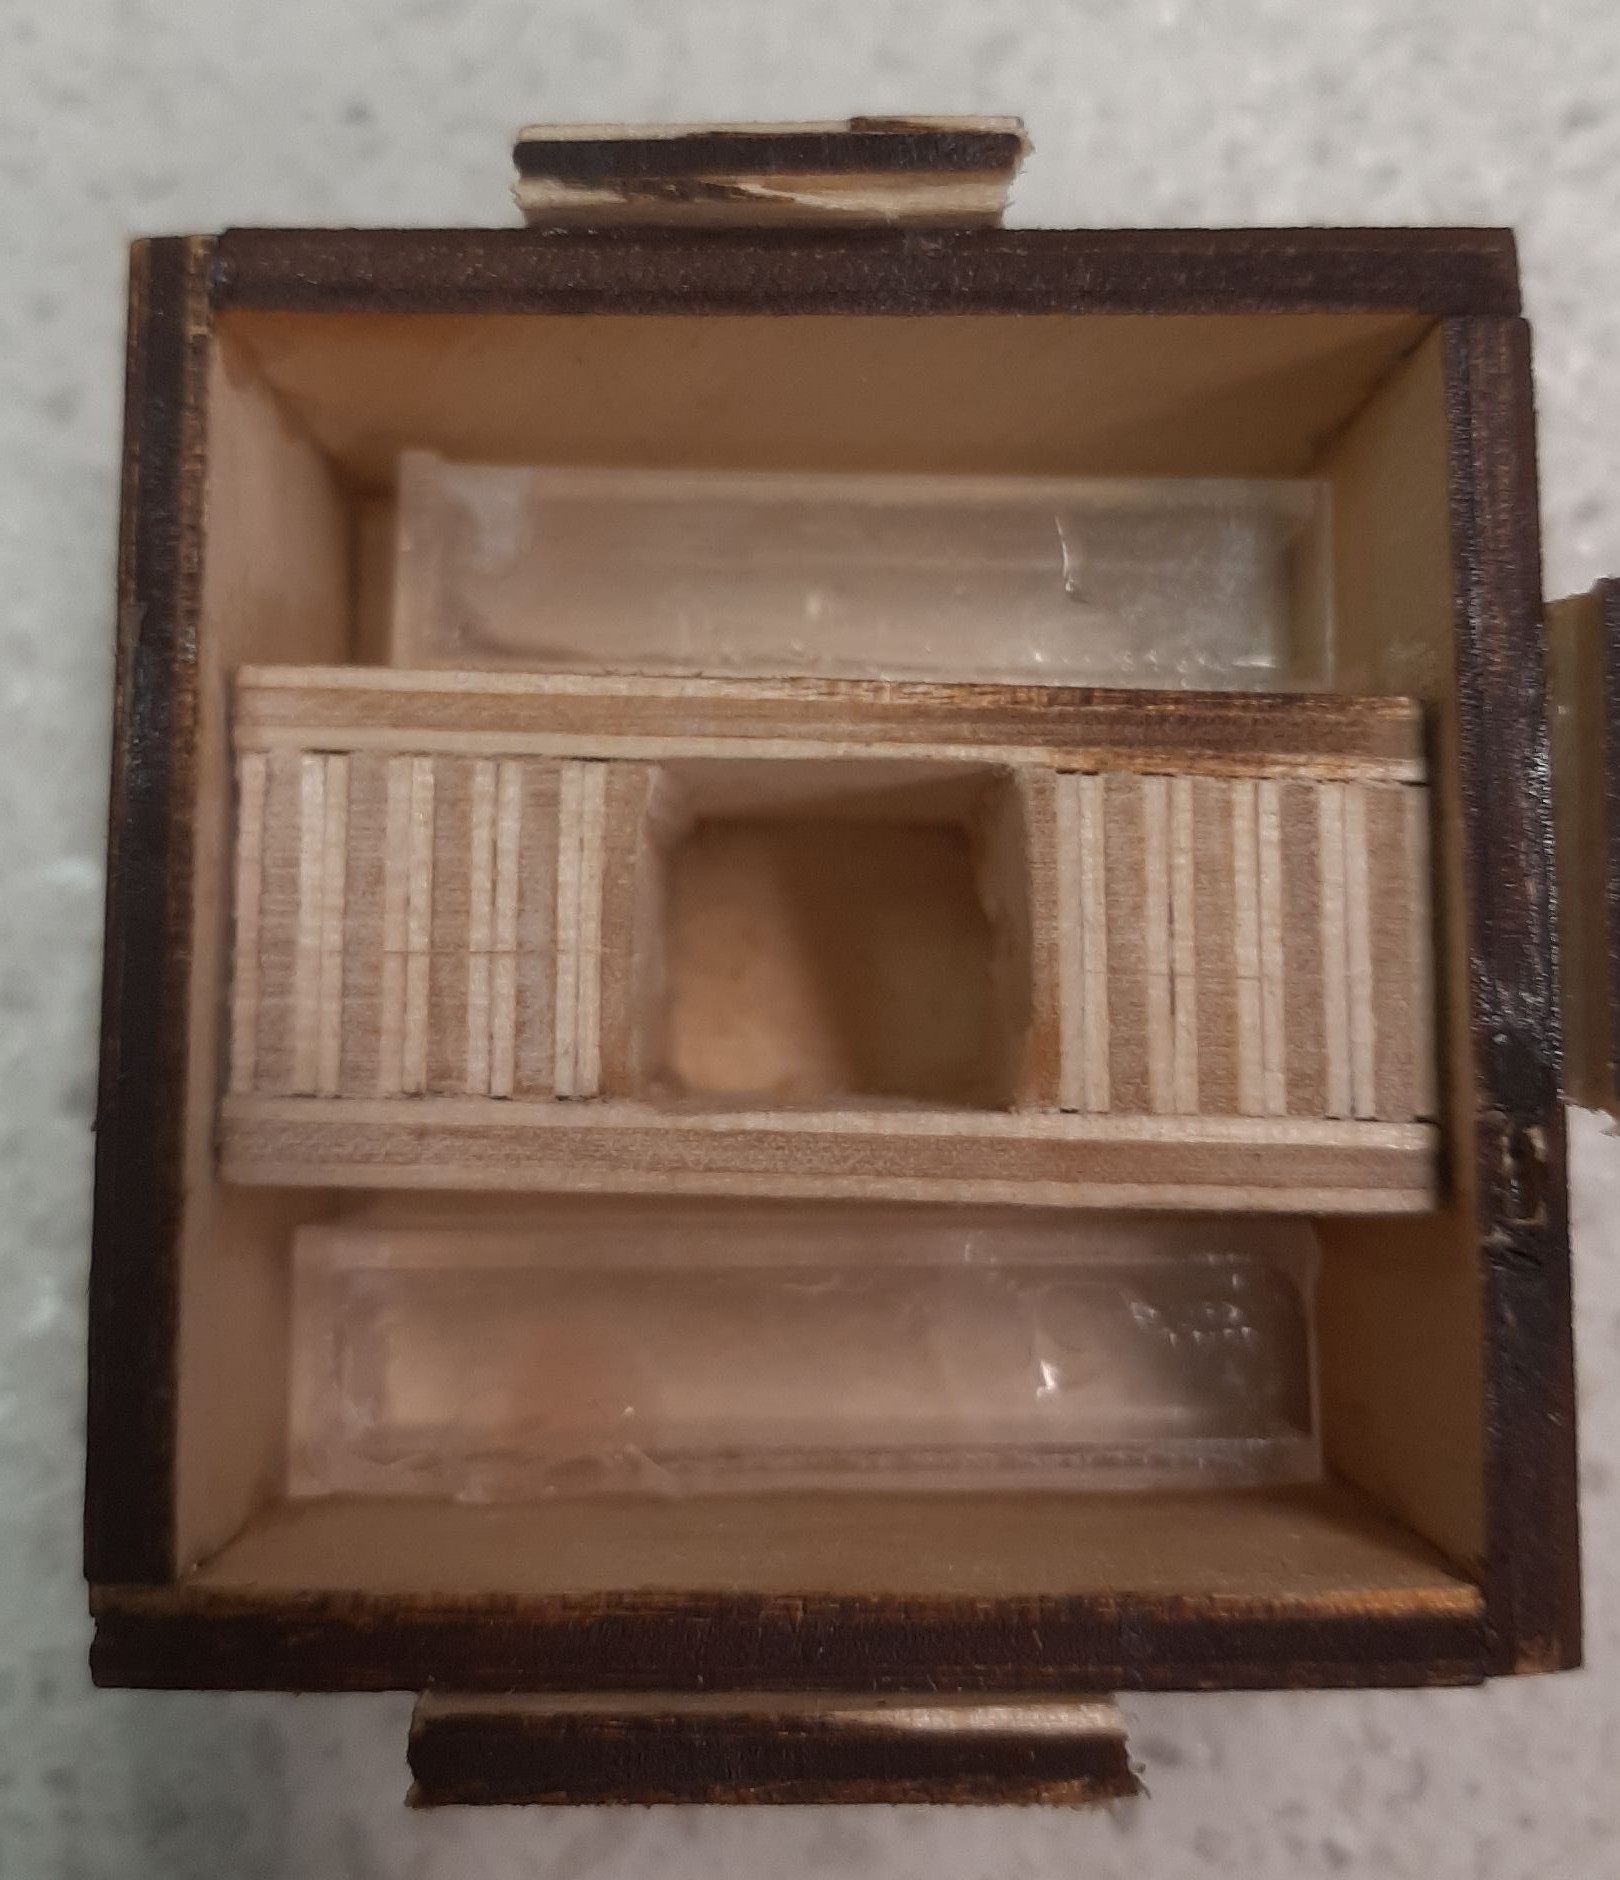
- a cuvette, a container that holds the liquid to analyse and defines a precise (relatively speaking) path length for the light to traverse.
I created the box with some plywood. I drilled two holes with diameters 3 and 5 mm to hold the light source and the detector. For the cuvettes, I used some 1.5mm acrylic, Tensol 12 to glue them, and a lot of anger (the small size made it impossible to clamp).
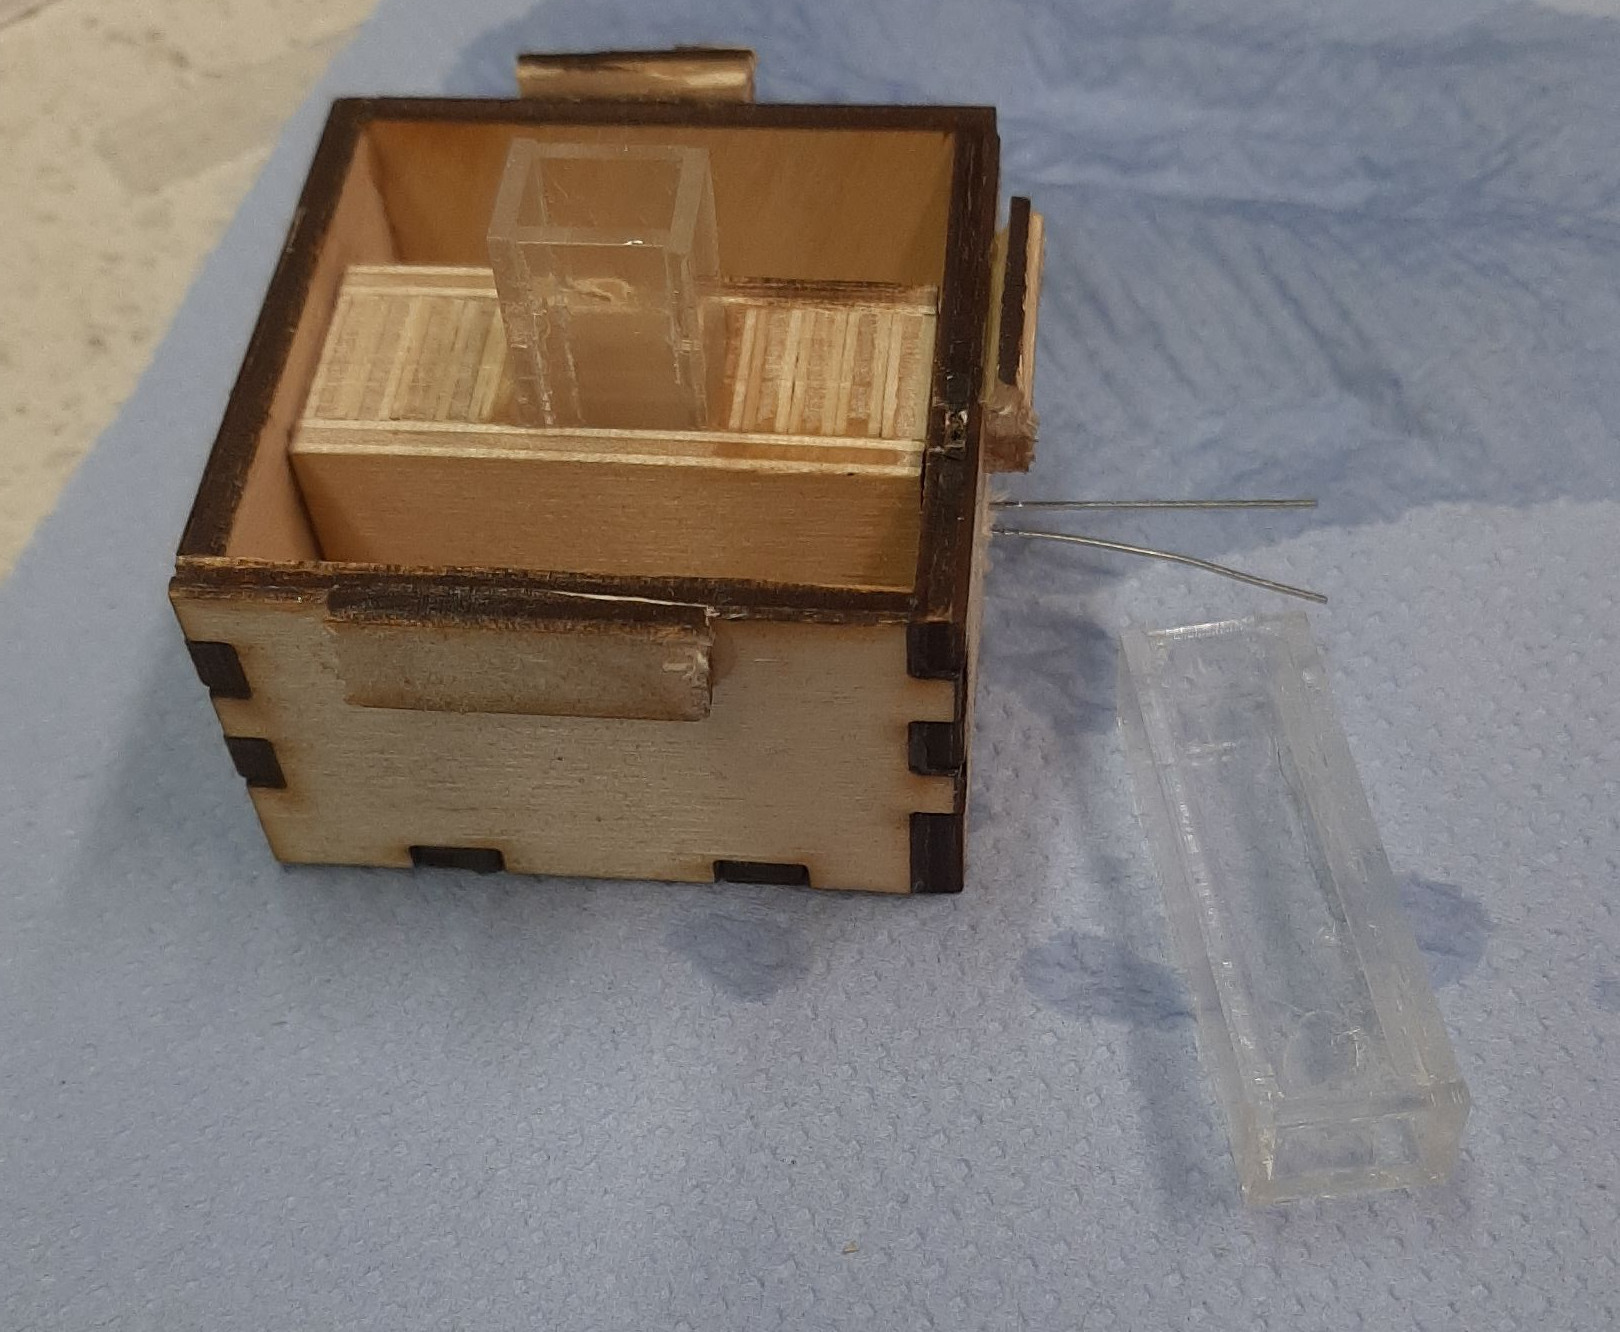
I built three cuvettes, as we need two for the standards and one for the sample. I could have used one, but with three it’s more practical as I can prepare the standards before the meeting. An accidental consequence of the build layout is that there’s space for packing the cuvettes in the unused space.
For the electronics, I used:
- A white LED as light source.
- A photoresistor as a detector. I have no idea of the type and model. I found it laying around.
- A handful of resistors.
- A MCP3008 analog to digital converter
- A raspberry Pi to control the LED and read the value.
Those of the readers who know a bit about turbidimetry will have plenty of objections, but remember, it’s a toy. I followed these instructions to connect the whole thing. The MCP3008 is an interesting little chip. It receives an analog voltage on up to 8 different channels (we’ll use only one) and gives a numerical value from 0 to 1023 out on an SPI bus. All you need to do is to connect the pins and measure the voltage as the photoresistor changes its resistance according to the amount of light it receives.
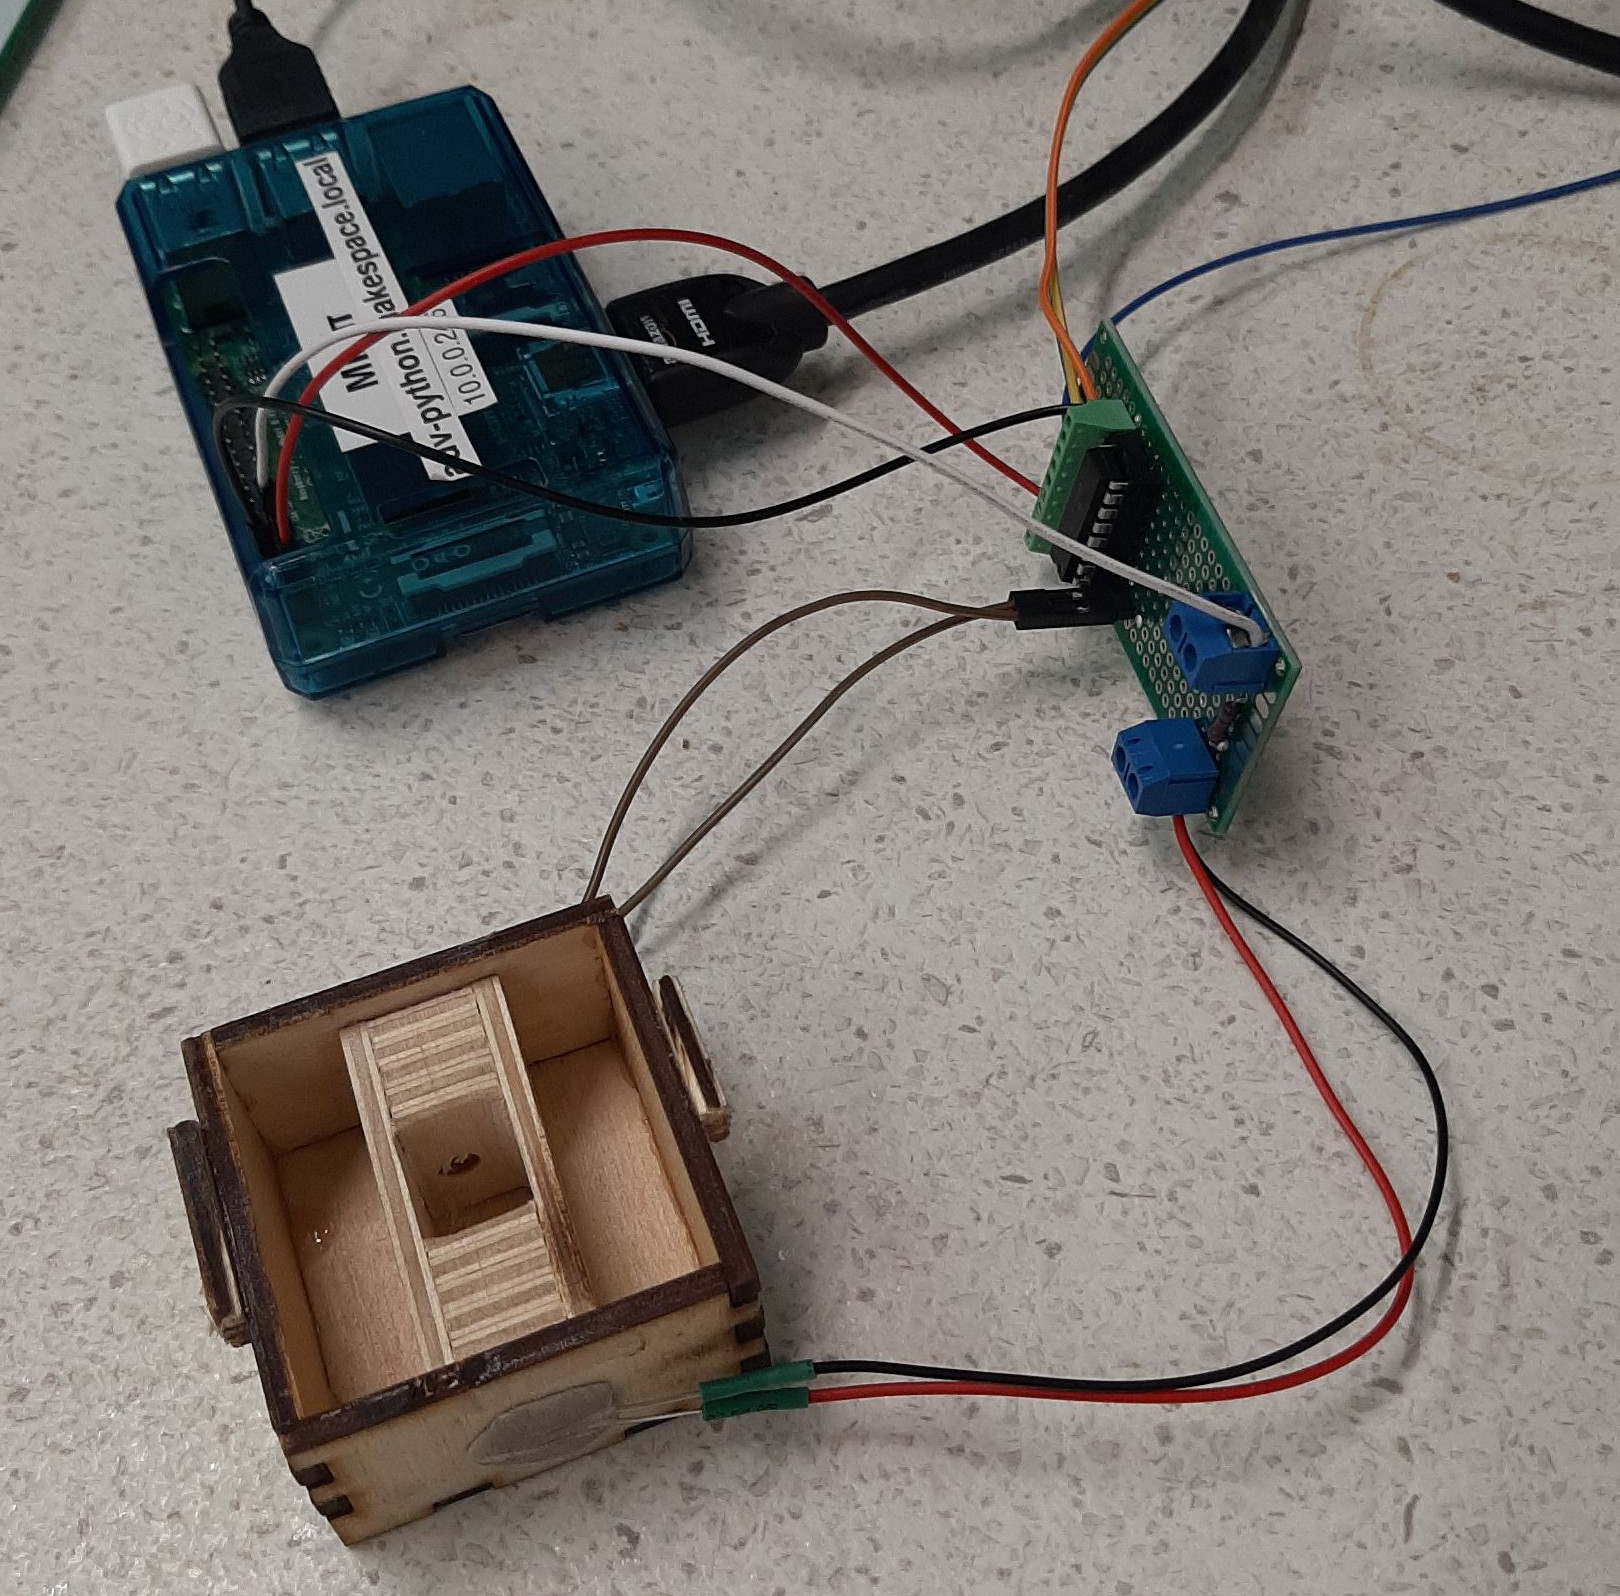
I decided to wire the LED to an actual output pin, rather than a permanent 3.3v source, so that during the exercises we also have to consider the enabling and disabling of the LED before and after the acquisition. It’s more fun that way.
The thing works perfectly and it’s ready to go.